Home Doc Getting Started How to Install Simple Social Buttons PRO?
How to Install Simple Social Buttons PRO?
We assume you have already installed the free version of Simple Social Buttons. It’s time to upgrade to the Pro version to access the advanced features that will help you modify your social sharing buttons.
Here we’ll provide a step-by-step guide that will help you upgrade to the Simple Social Buttons Pro version:
Let’s get started!
Step 1: Purchase Simple Social Buttons Pro
Remember, you’ll first require Simple Social Buttons (Free) to make SSB Pro work.
The first thing you’ll need to do is to select a pricing plan that best suits your needs.
For this purpose, go to the Pricing Page. Choose a pricing plan of your choice and click the Buy Now button.
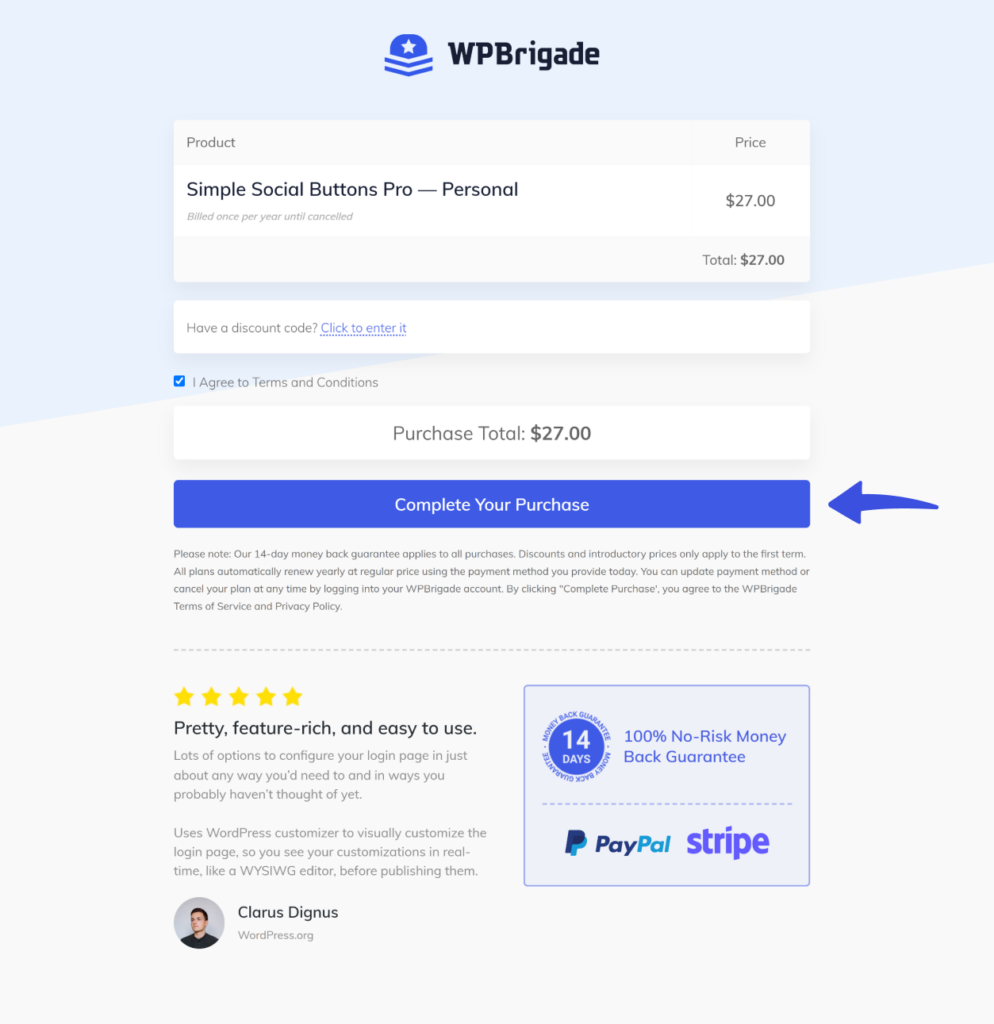
Note: Here, we are using the Personal Plan.

On the next screen, click the Complete Your Purchase button.
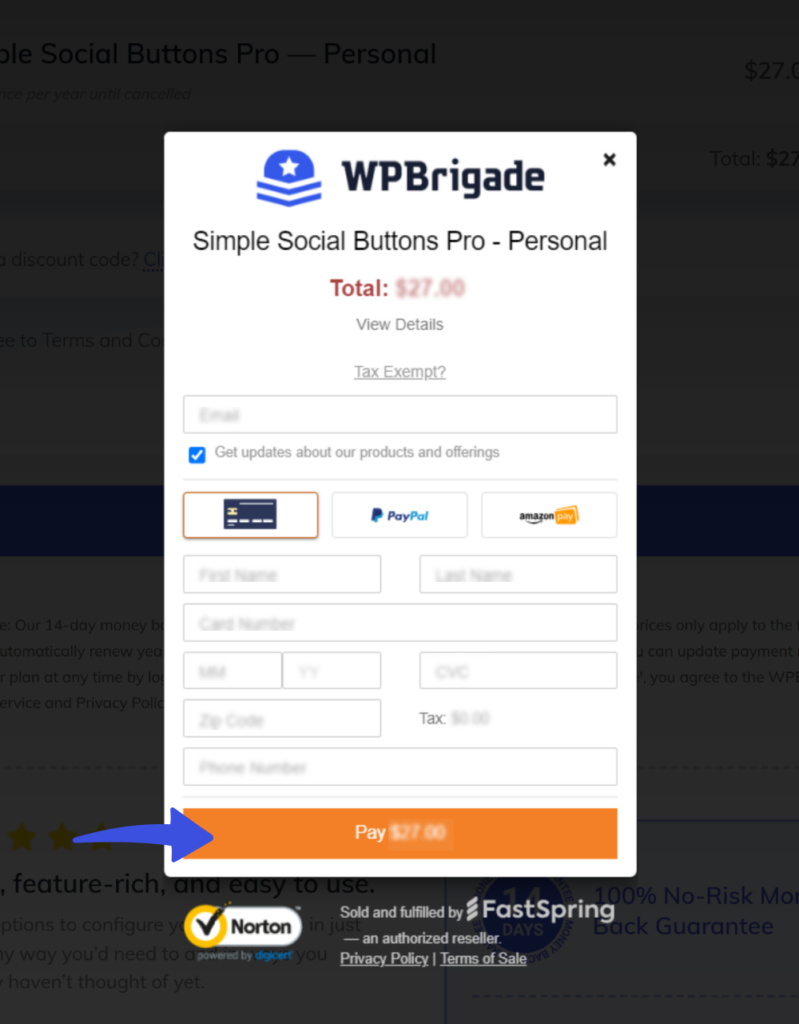
Now, you’ll get a popup where you’ll be required to provide your personal information, including:
- Email Address
- Payment Method
- First Name and Last Name
- Card Number
- Zip Code
- Phone Number
When done, click the Pay button.
Next, you’ll get a welcome note about what to do next.
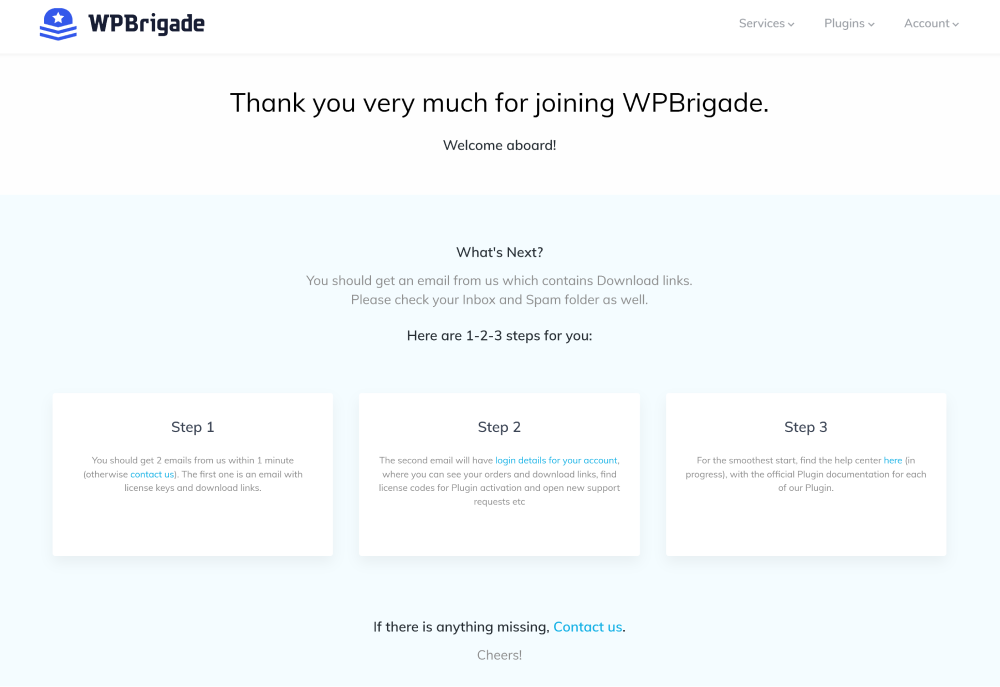
Visit your Email. You’ll receive two confirmation emails simultaneously at the purchased email address.
- The first confirmation email has the license key and download links.
- The second email will have the login details of your account.
Step 2: Download Simple Social Buttons Pro Zip File
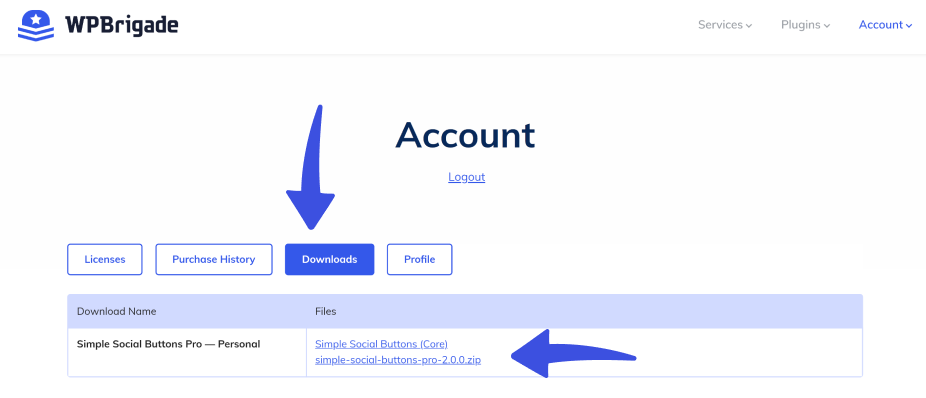
Now, login to your WPBrigade Account, navigate to the Downloads tab and download the LoginPress Pro .zip file.
Step 3: Add Simple Social Buttons Pro Zip File to WordPress
After downloading the Simple Social Buttons Pro zip file from the WPBrigade account, it’s time to add it to your WordPress.
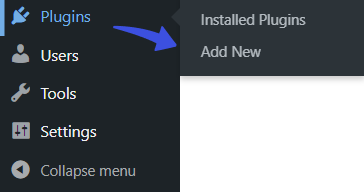
To do this: Log in to your WordPress, navigate to Plugins, and click the Add New option.
On the next screen, click the Upload Plugin and then Choose File button.
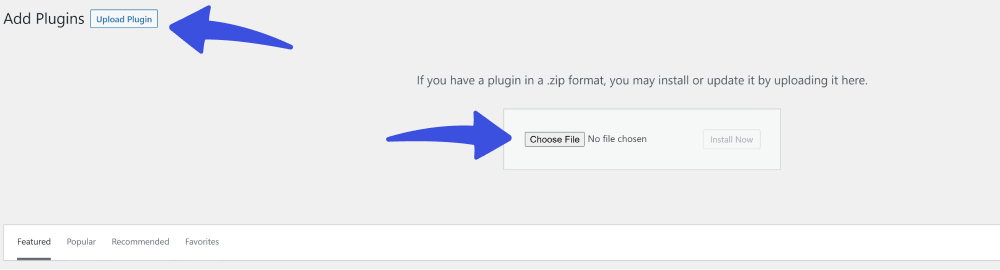
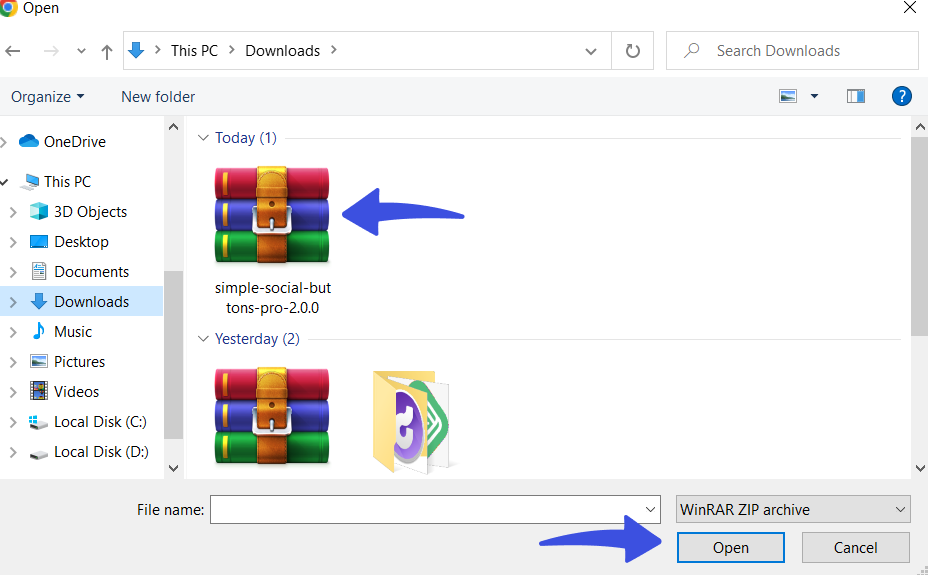
A popup screen will appear where you must select the downloaded version of the Simple Social Buttons Pro zip file.
When done, click the Install Now button.

Step 4: Activate License Key
After installation, you’ll require time to activate the license key. It’s mandatory to validate your license key to use automatic updates and plugin support.
You can find it in your WPBrigade Account or in the Email you get in your Purchase Email address.
Note: Here, we will do this via the WPBrigade account.
Go to the WPBrigade account and click the Licenses tab.
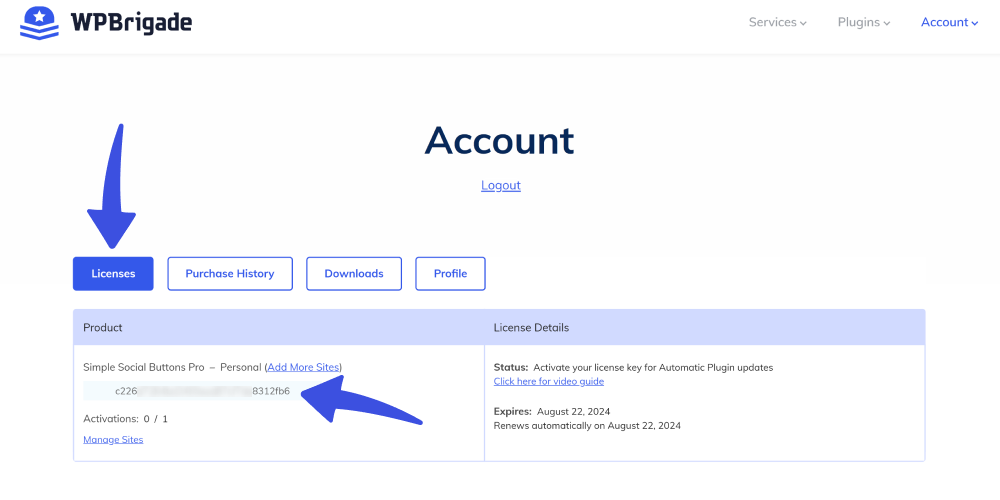
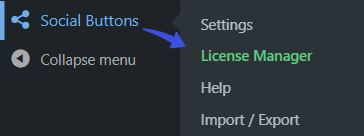
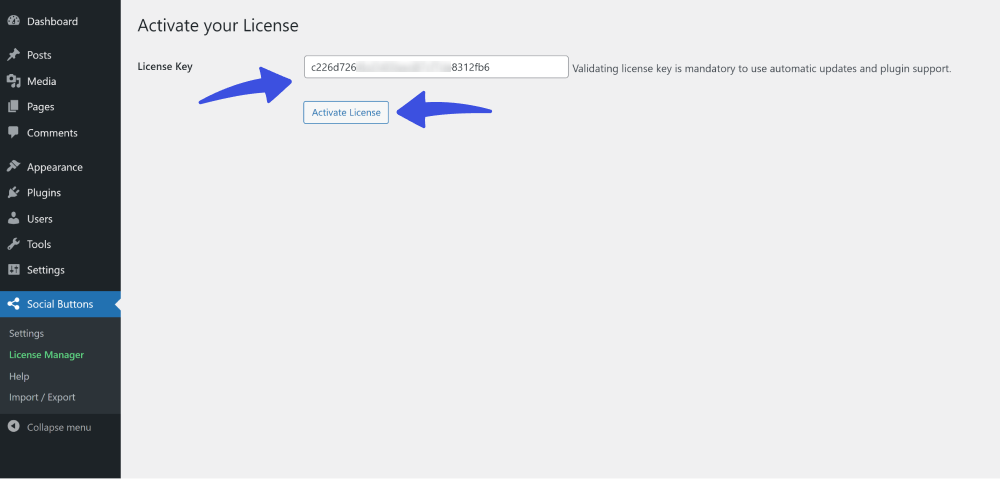
Copy the License Key, and return to the WordPress admin dashboard. Navigate to Social Buttons and select the License Manager option.
Here you’ll see the License key field. Simply paste the license key inside the license field and click the Activate License button.
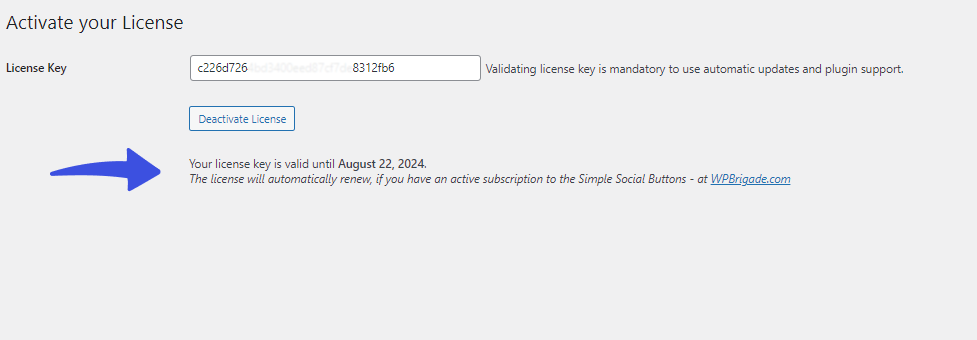
Congratulations! You’ve successfully activated the Simple Social Buttons Pro.
Now you can add more designs and positions for your social sharing buttons.
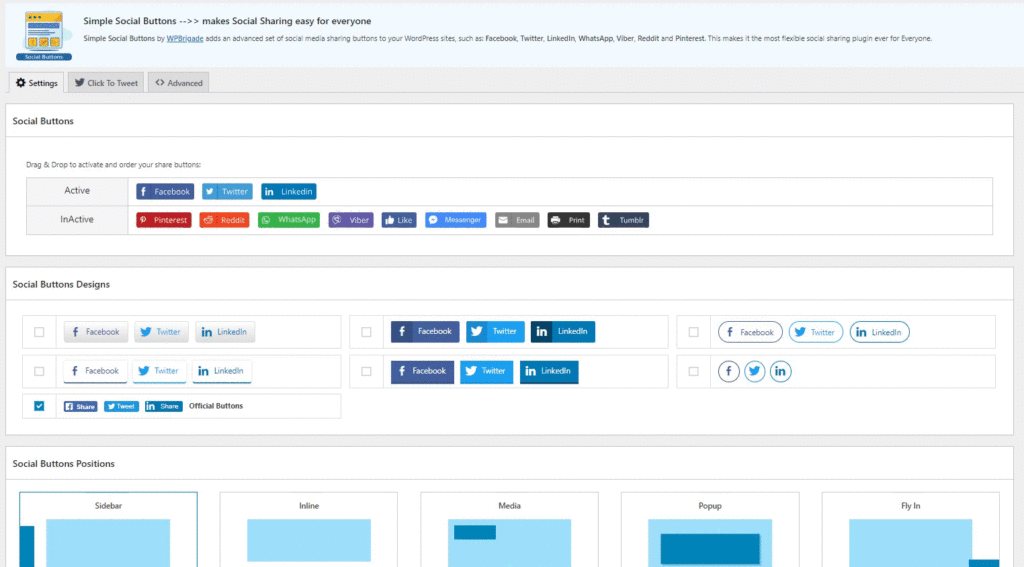
Upgrade to Simple Social Buttons Pro now and get more advanced features, such as adding more designs for your social buttons, and different positions, i.e., inline, media, popup, and more.
In addition, Social Share Buttons Pro has introduced NextGEN Gallery integration. This combination has made sharing your gallery easy across different social media platforms.
You may like to read our detailed article on Social Share Buttons With NextGEN Gallery: A New Solution.
If you have any doubts or questions related to this matter, please don’t hesitate to contact our support team.